
10 Pro Tips for Easy Food Photo Composition
Telling your food story to your viewer isn’t just placing your goodies on a surface and shooting a picture. The eye naturally is attracted to certain shapes, and patterns that pull your viewer in. Luckily the great art masters already did the hard part to identify these compositional patterns to give us a cheat sheet for great images. I have identified 10 of these elements that can easily take your food photos to the next level.
1. Read the Image Like a book
In the Western world, we read from left to right meaning the viewer’s eye travels through an image in the same way. This knowledge helps you guide the eye to your main subject in an intentional way while taking them through your story.
2. Use Angle and Orientation
to Compliment the Food
Your camera’s angling help to tell different stories, and certain foods tend to lend themselves to certain angles. The main camera angles for food photography are the Overhead (or 90 degrees), 45 degrees, and straight-on.
To know which angle to use, study first the story you want to tell (i.e., the type of food, the props, and where the story takes place).
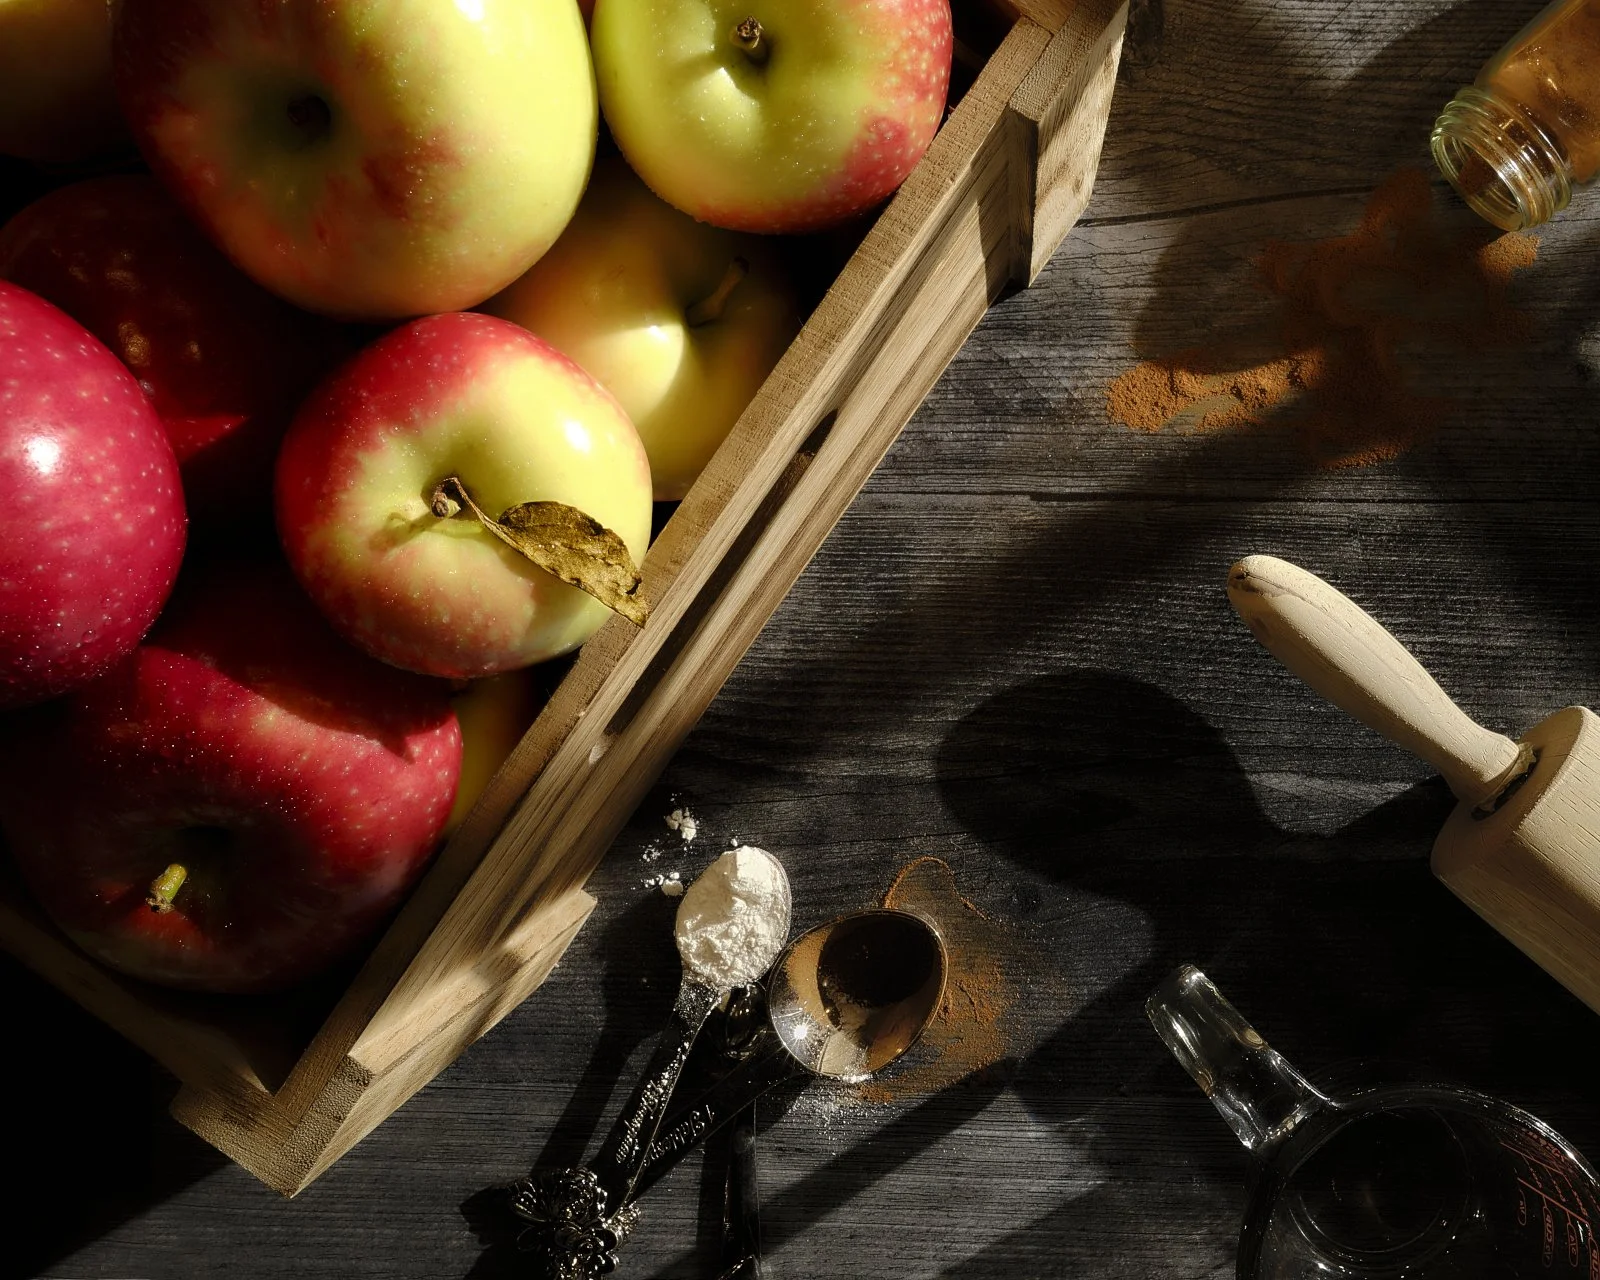
Overhead
The overhead view helps to create visual order and minimize height differences between the various elements of your image. Using patterns in these images are crucial, otherwise the elements won’t appear as though they belong together. The orientation of the camera can be in landscape or portrait depending on the subject and way you want your image to be read.
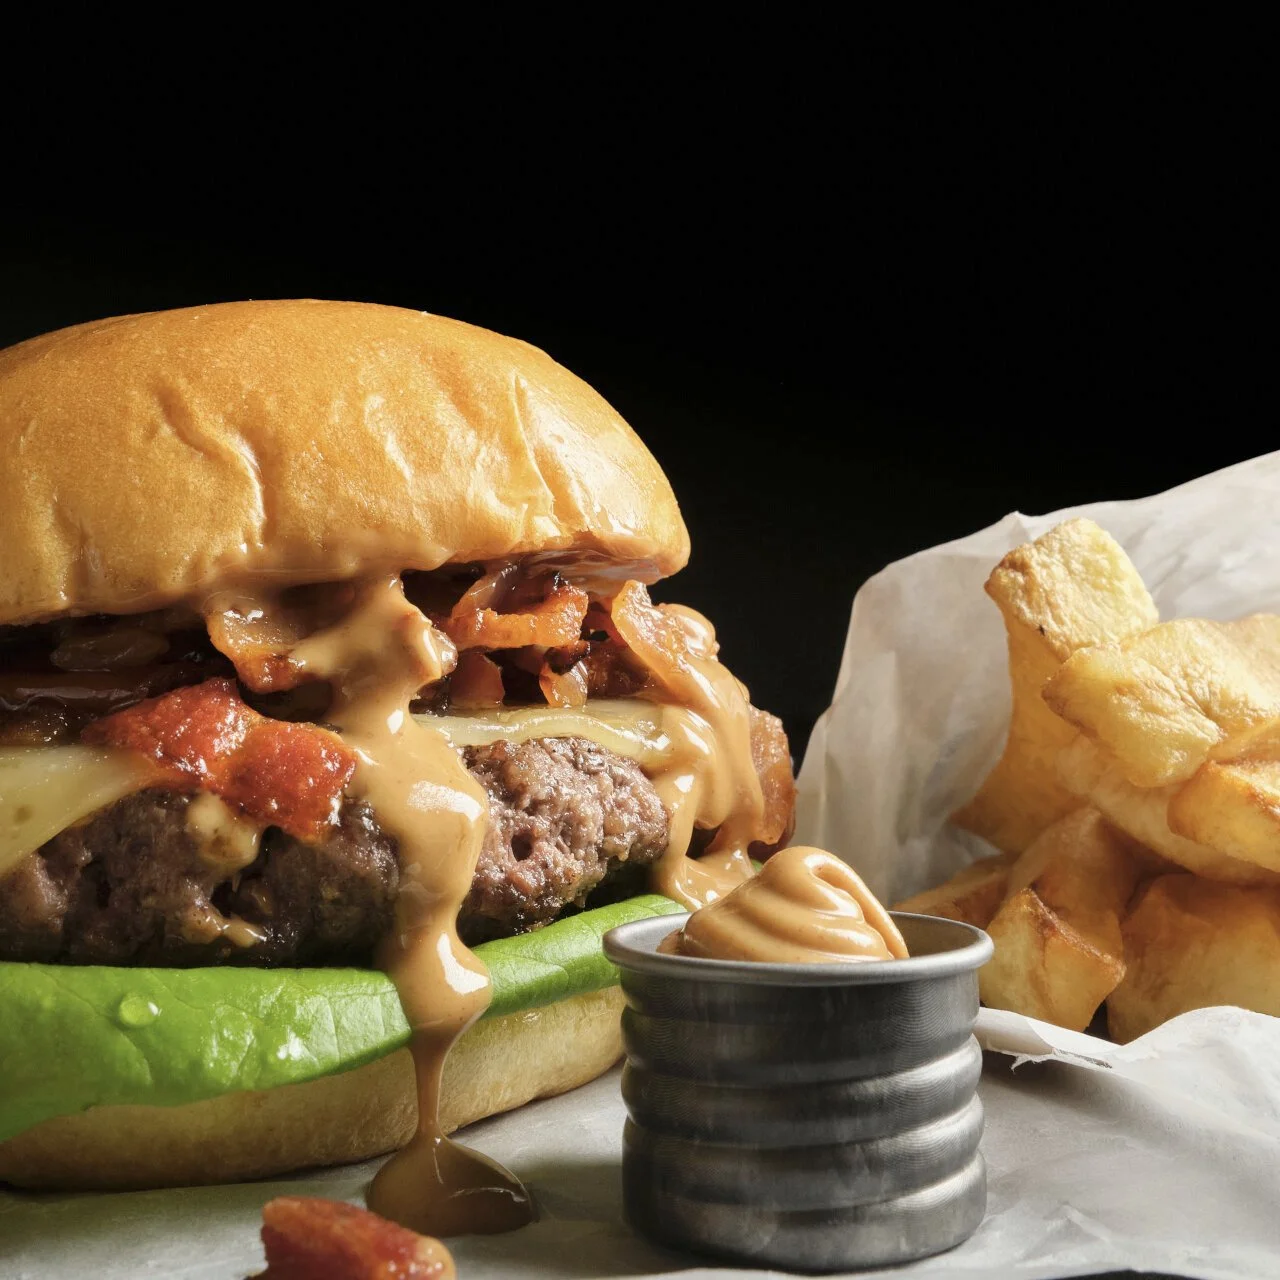
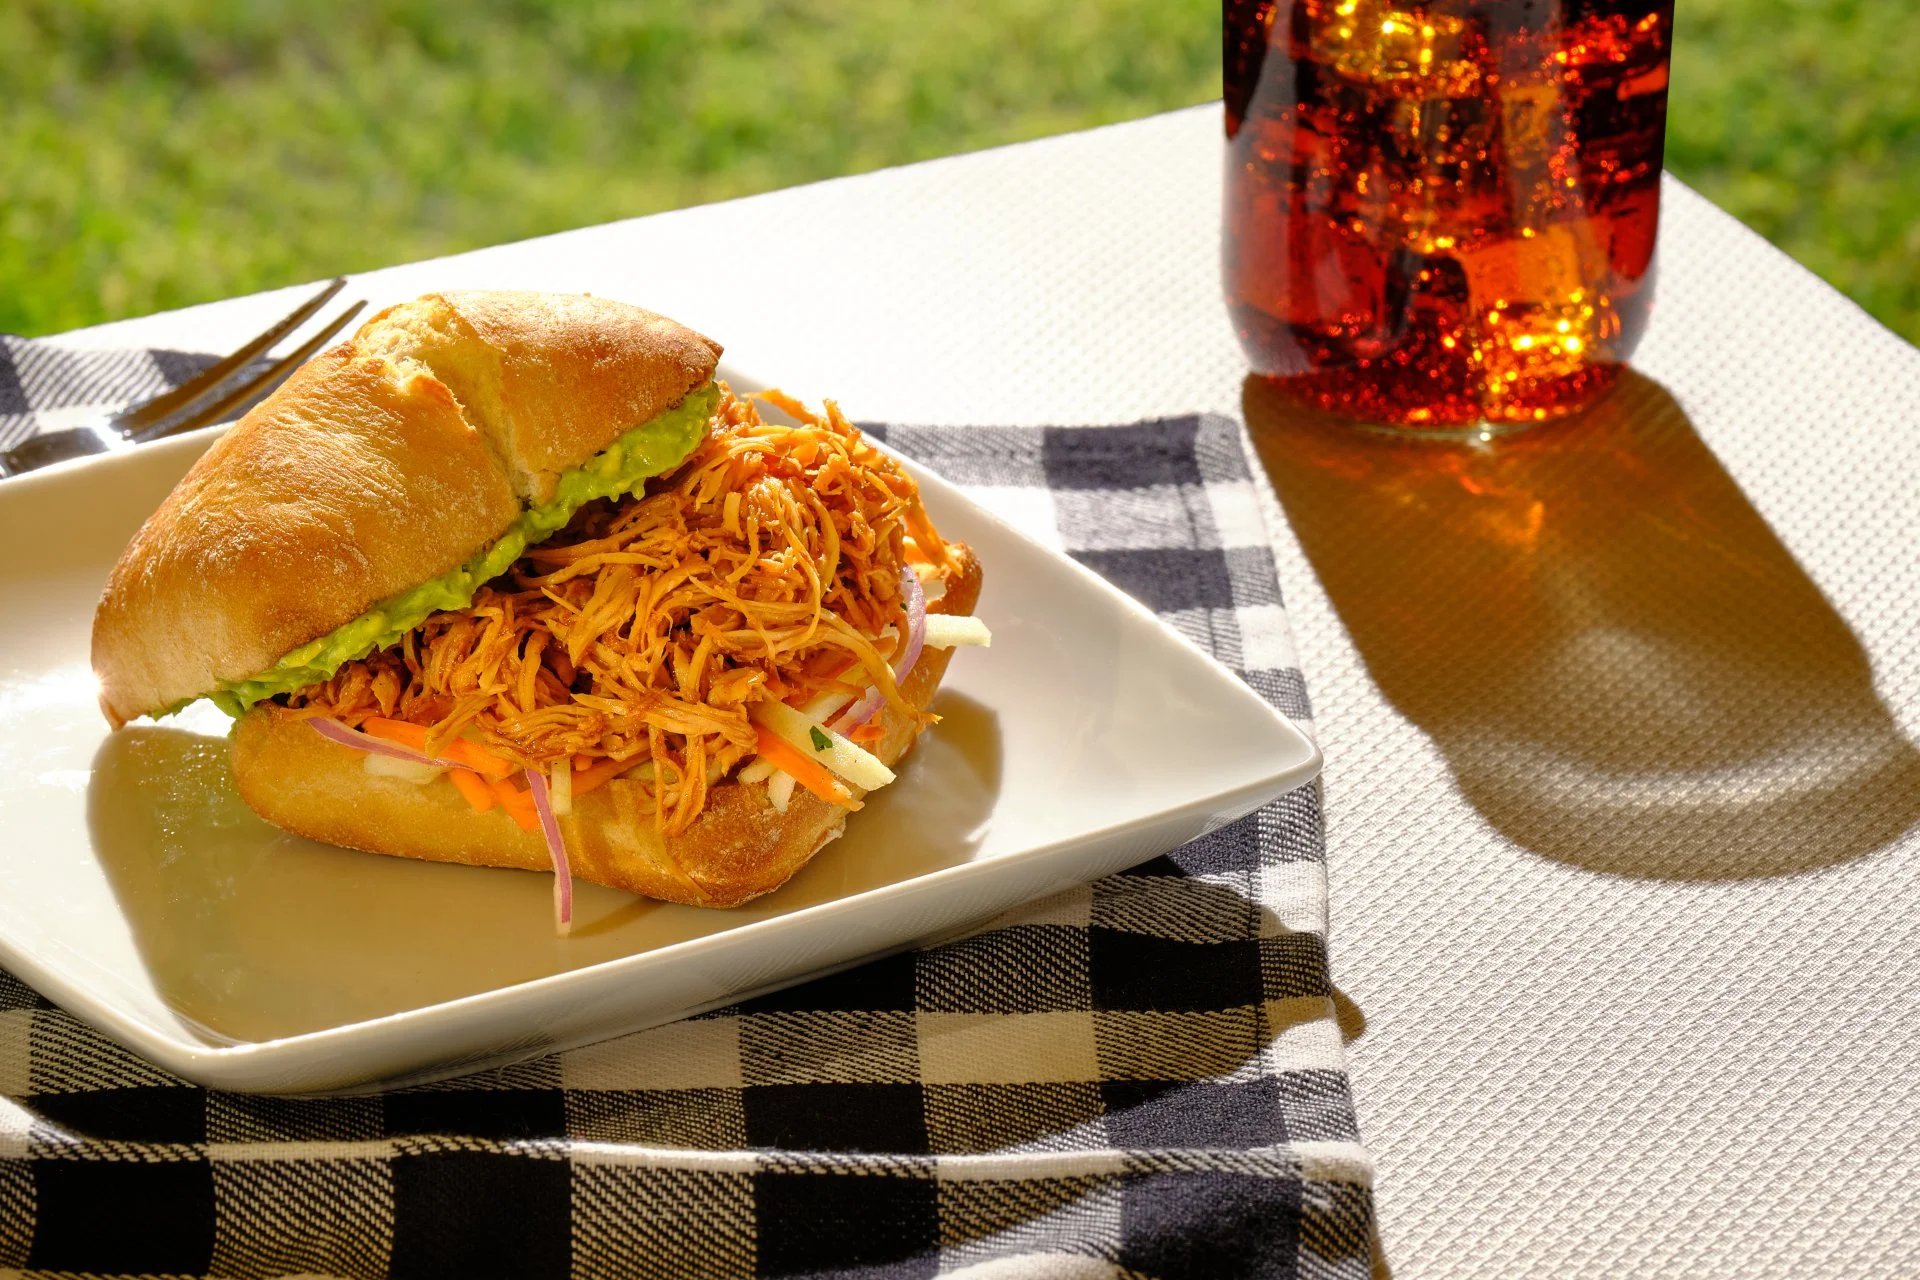
Straight On
Tall foods like burgers look best using a straight-on angle. It not only makes the food seem taller but allows the subject to show off all its yummy layers. These images are typically shot in portrait orientation to emphasize height and keep the image tidy.
45 Degree Shot
The 45-degree shot is best to place the viewer at the table since that is how we see the food when we are about to dig in! These shots are typically shot in landscape again to help the viewer feel like they are at the table.
3. Identify the Star of the Show
When setting the scene, identify the star of the show and utilize a supporting cast of elements to help emphasize it. This can be done with light, color, contrast or the supporting cast guiding your eye.
Of course, you can have more than one main subject but typically, having one point of interest makes your composition much more coherent.
Furthermore, including props of different sizes balance out the image.
Think of the objects in the image actually having real weight that you have to balance across the image.
For those of you using cameras with adjustable aperture (if you don’t know what that is, don’t worry about it), you can use a narrower depth of field to isolate as well. Just don’t go so narrow as to have parts of your yummy subject out of focus!
4. Use Negative Space to Provide Balance

Positive space is the area your food and props take up. Meanwhile, negative space is the area where your eyes can rest.
It provides balance, a bit of breathing room, and emphasis on the subject. Because it’s mostly blank, it brings your attention to the details in the food.
In food photography, there is a tendency to shoot with a lot of empty spaces to create a spot for text placement. You’ll notice this a lot in magazine shoots, product packaging, or ad work. When there is too much going on in an image, the viewer is unsure of where to look.
If you want to use negative space, use patterns or backgrounds that complement your subject. That way, your main point of interest will stand out more.
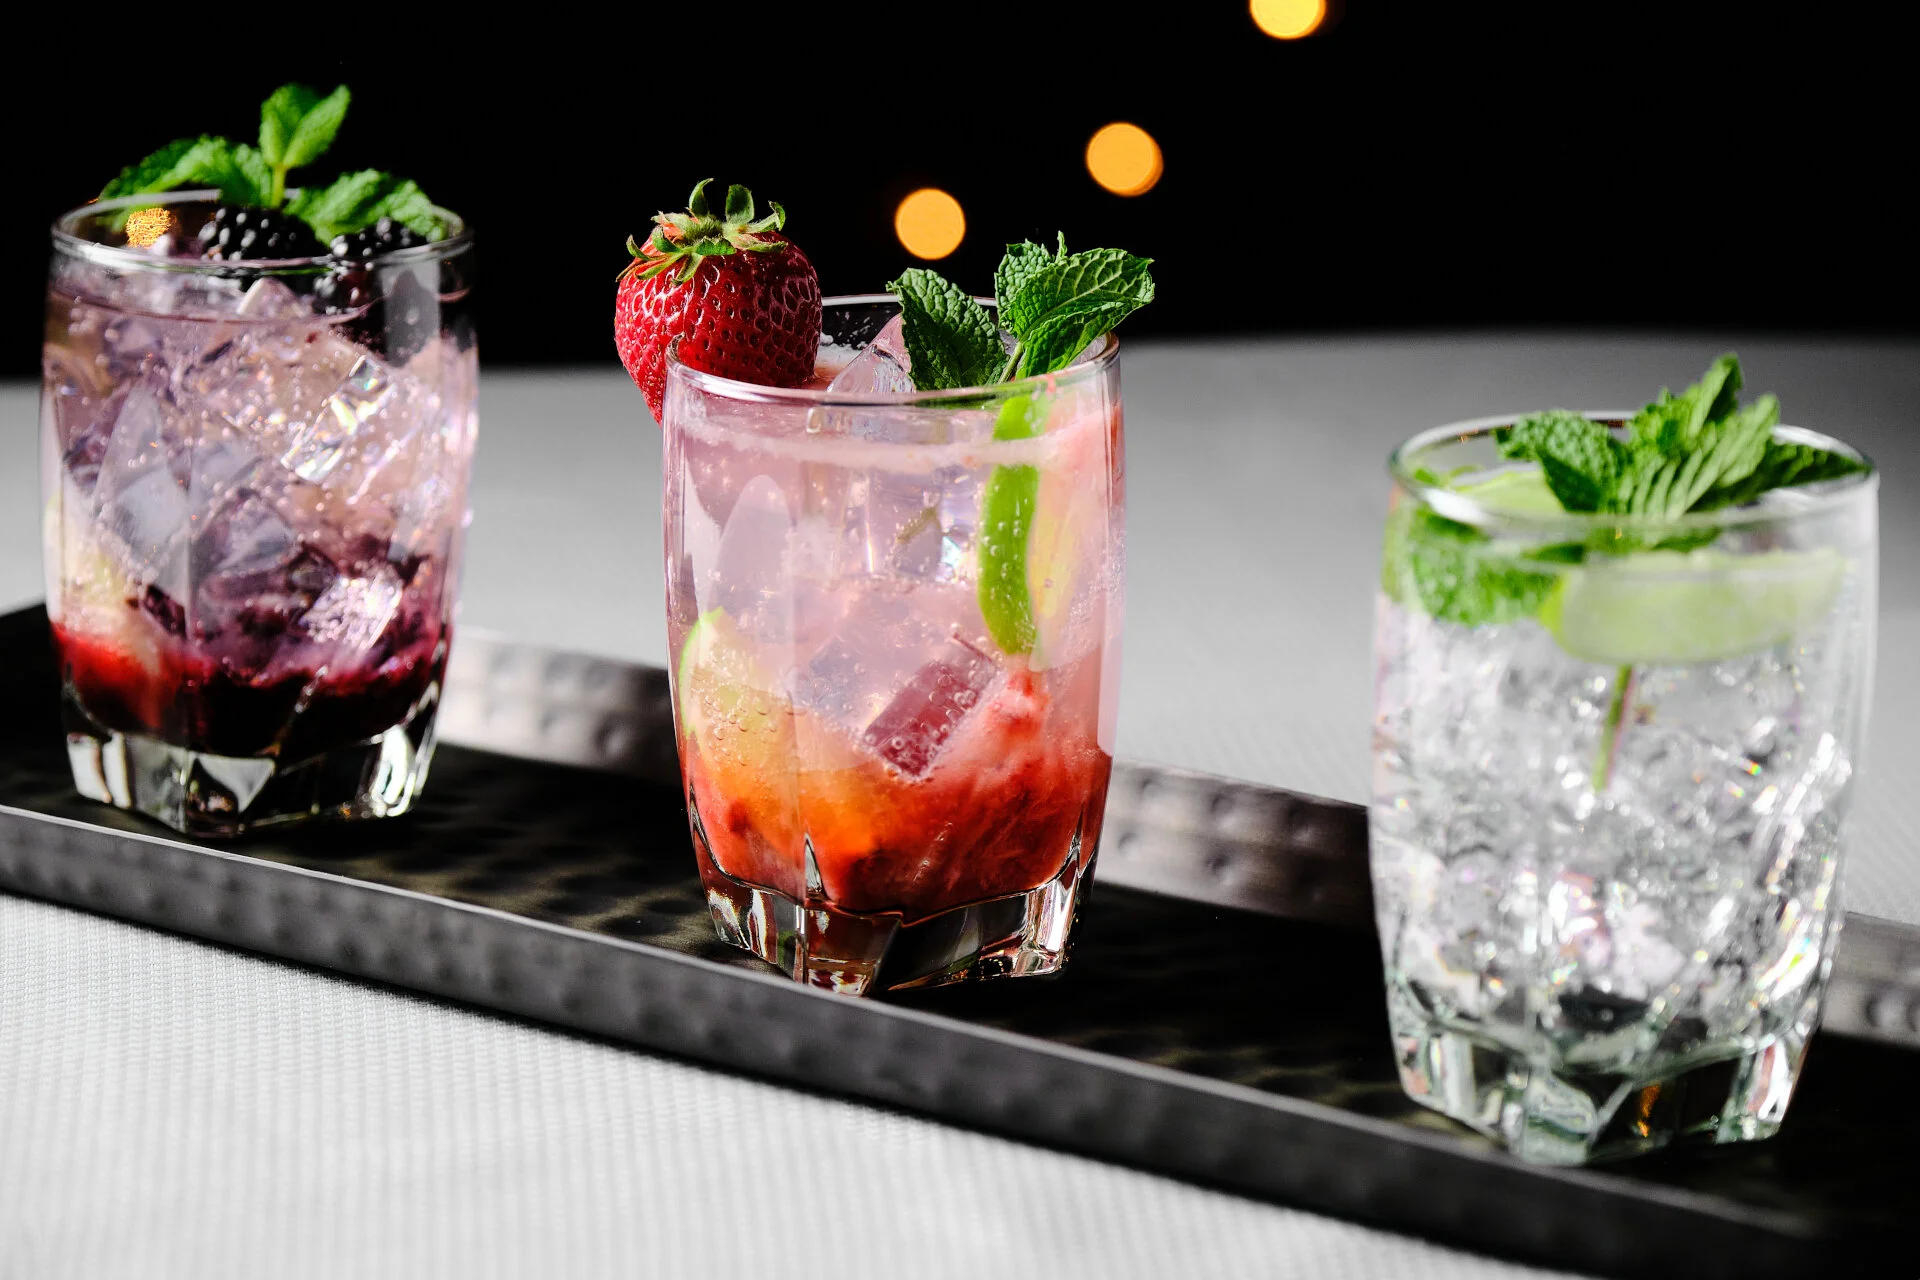
5. Use the Rule of Odds to Create Balance

When photographing a group of objects, use an odd number of elements in your image.
Odd numbers create a sense of balance and harmony. Of course, it also provides a resting point for our eyes by having a center object with equal objects on either side. An even number of objects can divide our attention, compete with one another, and feel like our imaginary scale is off balance.
In food photography, the ideal is to have three or five props. Of course, you can have more than five items. But the result will be different and not bring the same compositional effect.
6. Visualize the Composition with Crop Guides
Crop guides help you fix your composition when post-processing food photography.
You can find crop guides in Lightroom, Photoshop, Capture One, or even on your phone! Use them to help you visualize your composition. It can take years for a photographer to master composition rules only by imagining the lines, so these crop guides are invaluable for showing us exactly where to place our main subjects, and can even speed up the process of learning to compose intuitively, which is the ultimate goal.
Once you take the image, check how it looks with the crop guide of your choice, and then adjust your composition as needed.
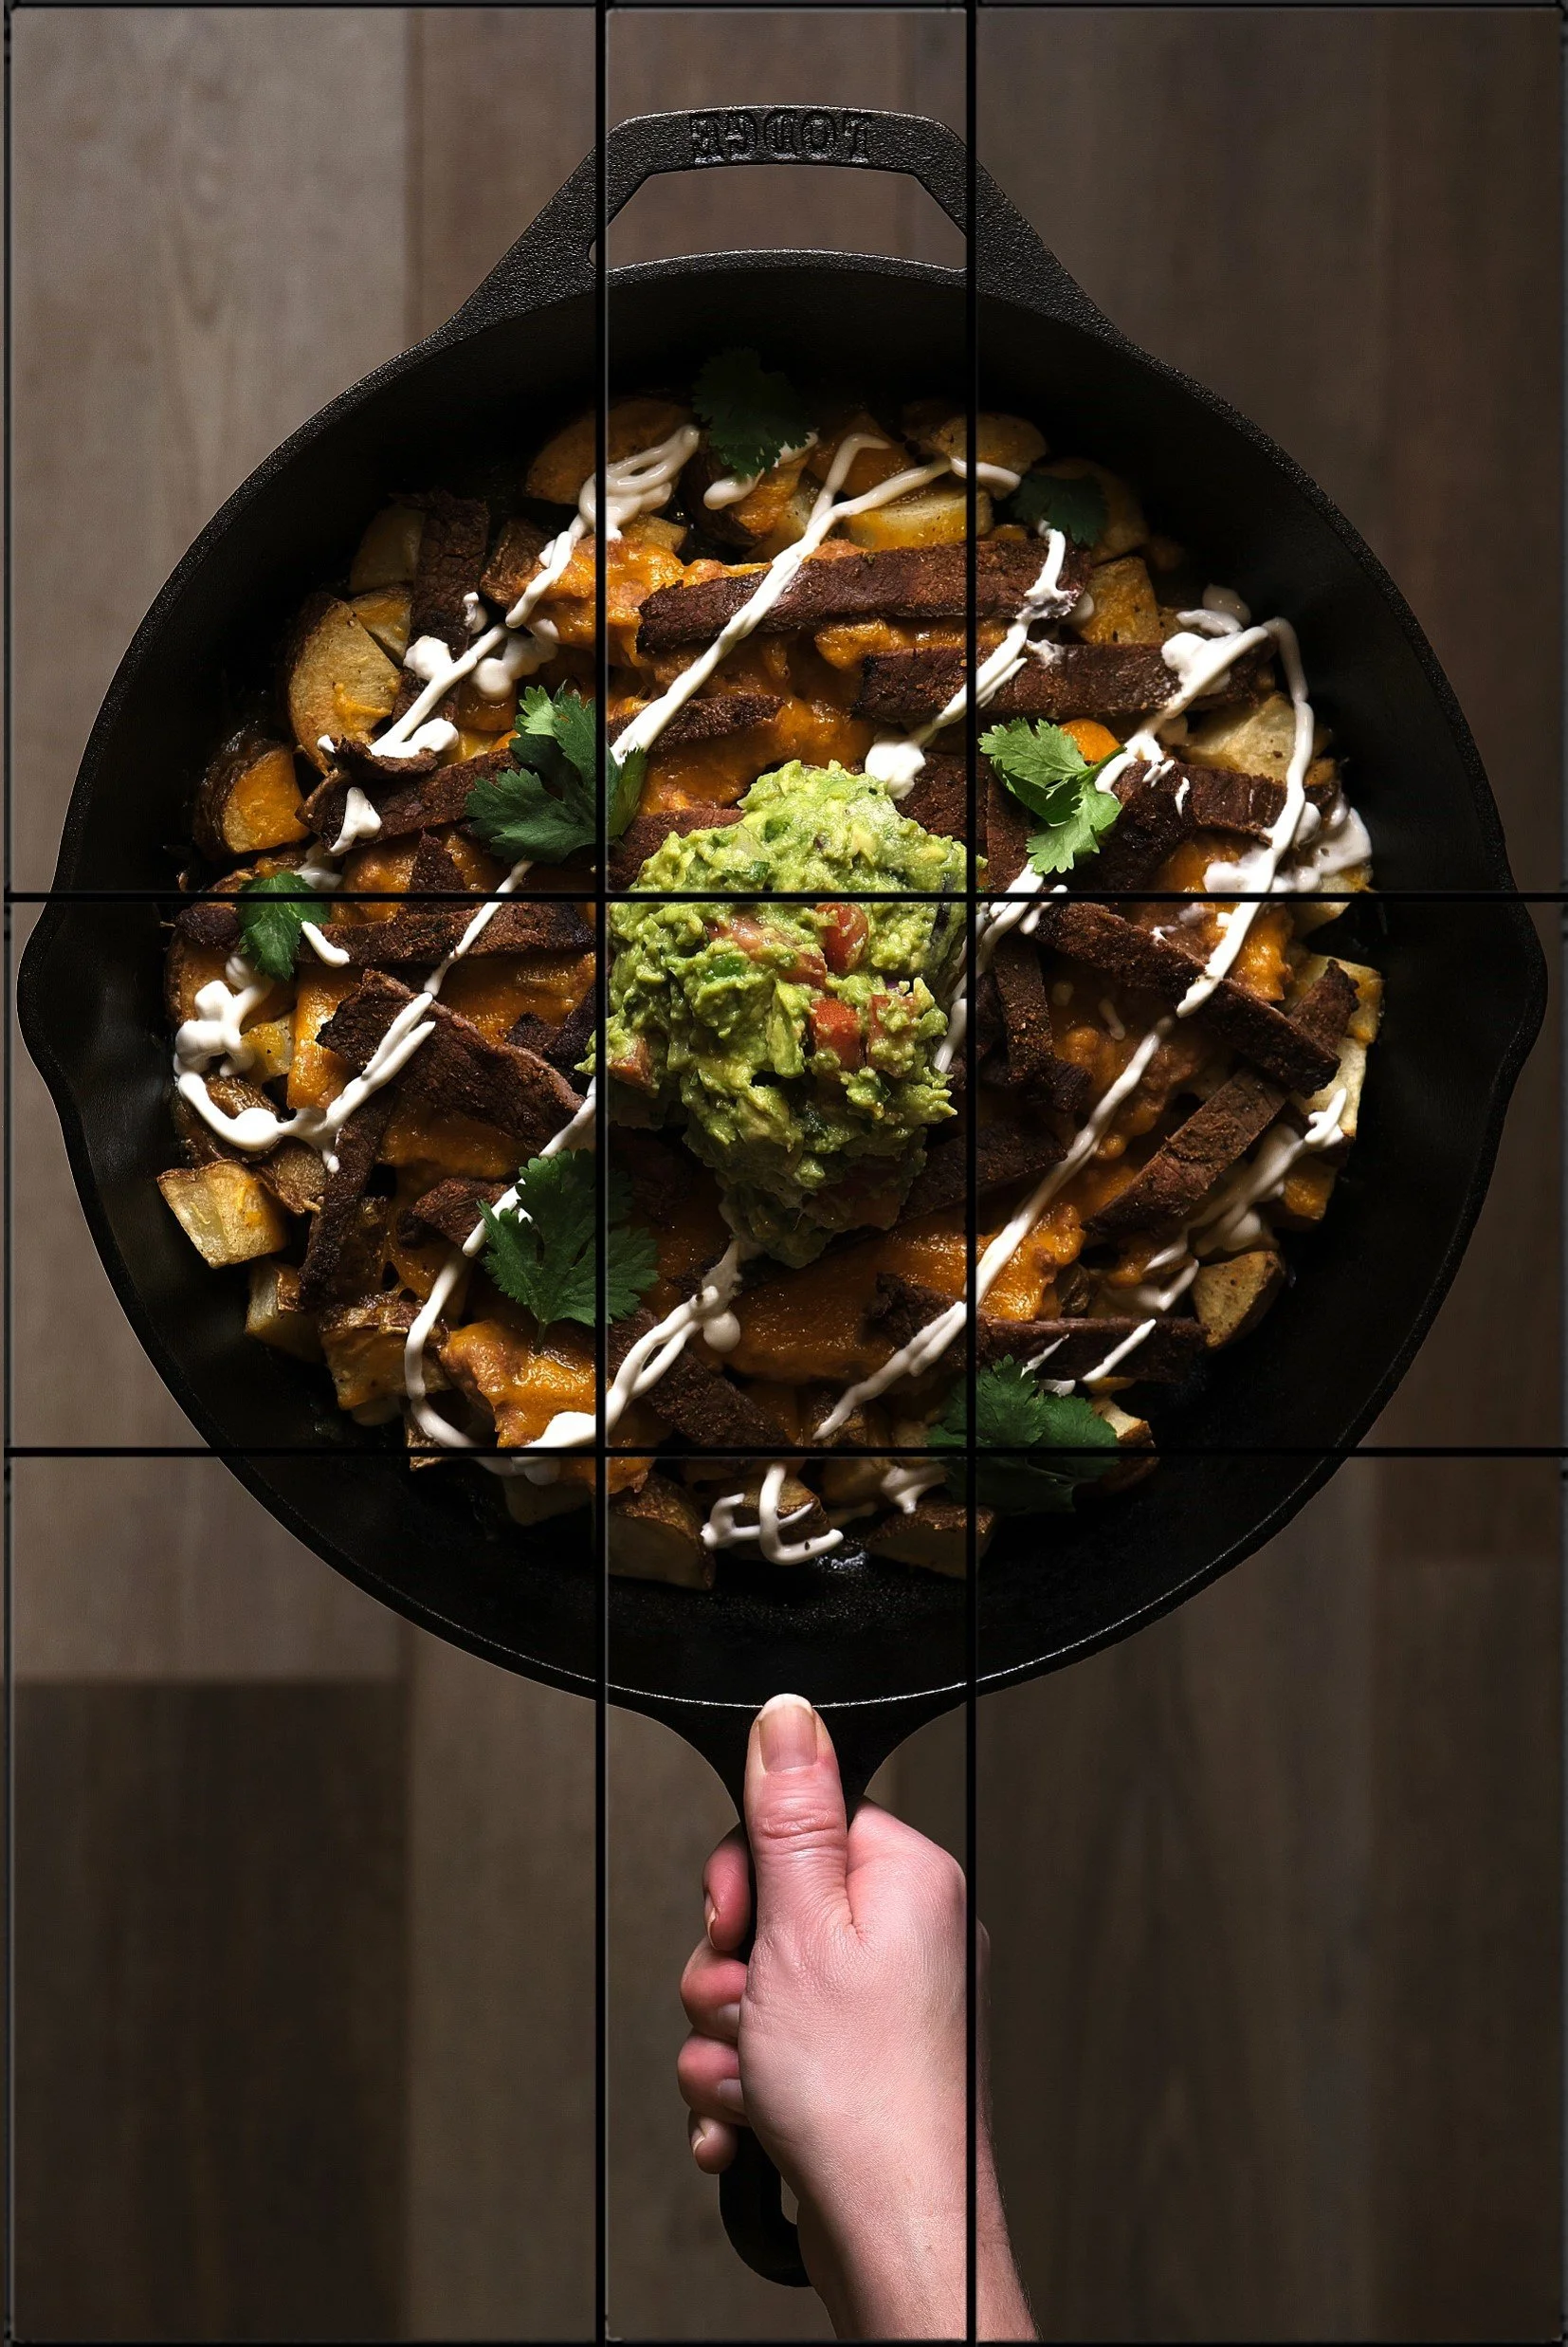
7. Place Main Elements Using the Rule-of-Thirds

When learning about photography and food photography composition, typically the first and easiest one to master that you will come upon is the Rule of Thirds.
It’s a grid that divides the frame into nine equal sections. The crucial elements in the scene fall along the grid’s lines, or at the 4 points where they intersect.
The Rule of Thirds is an easy starting place to figure out how to place the main elements in your photos.
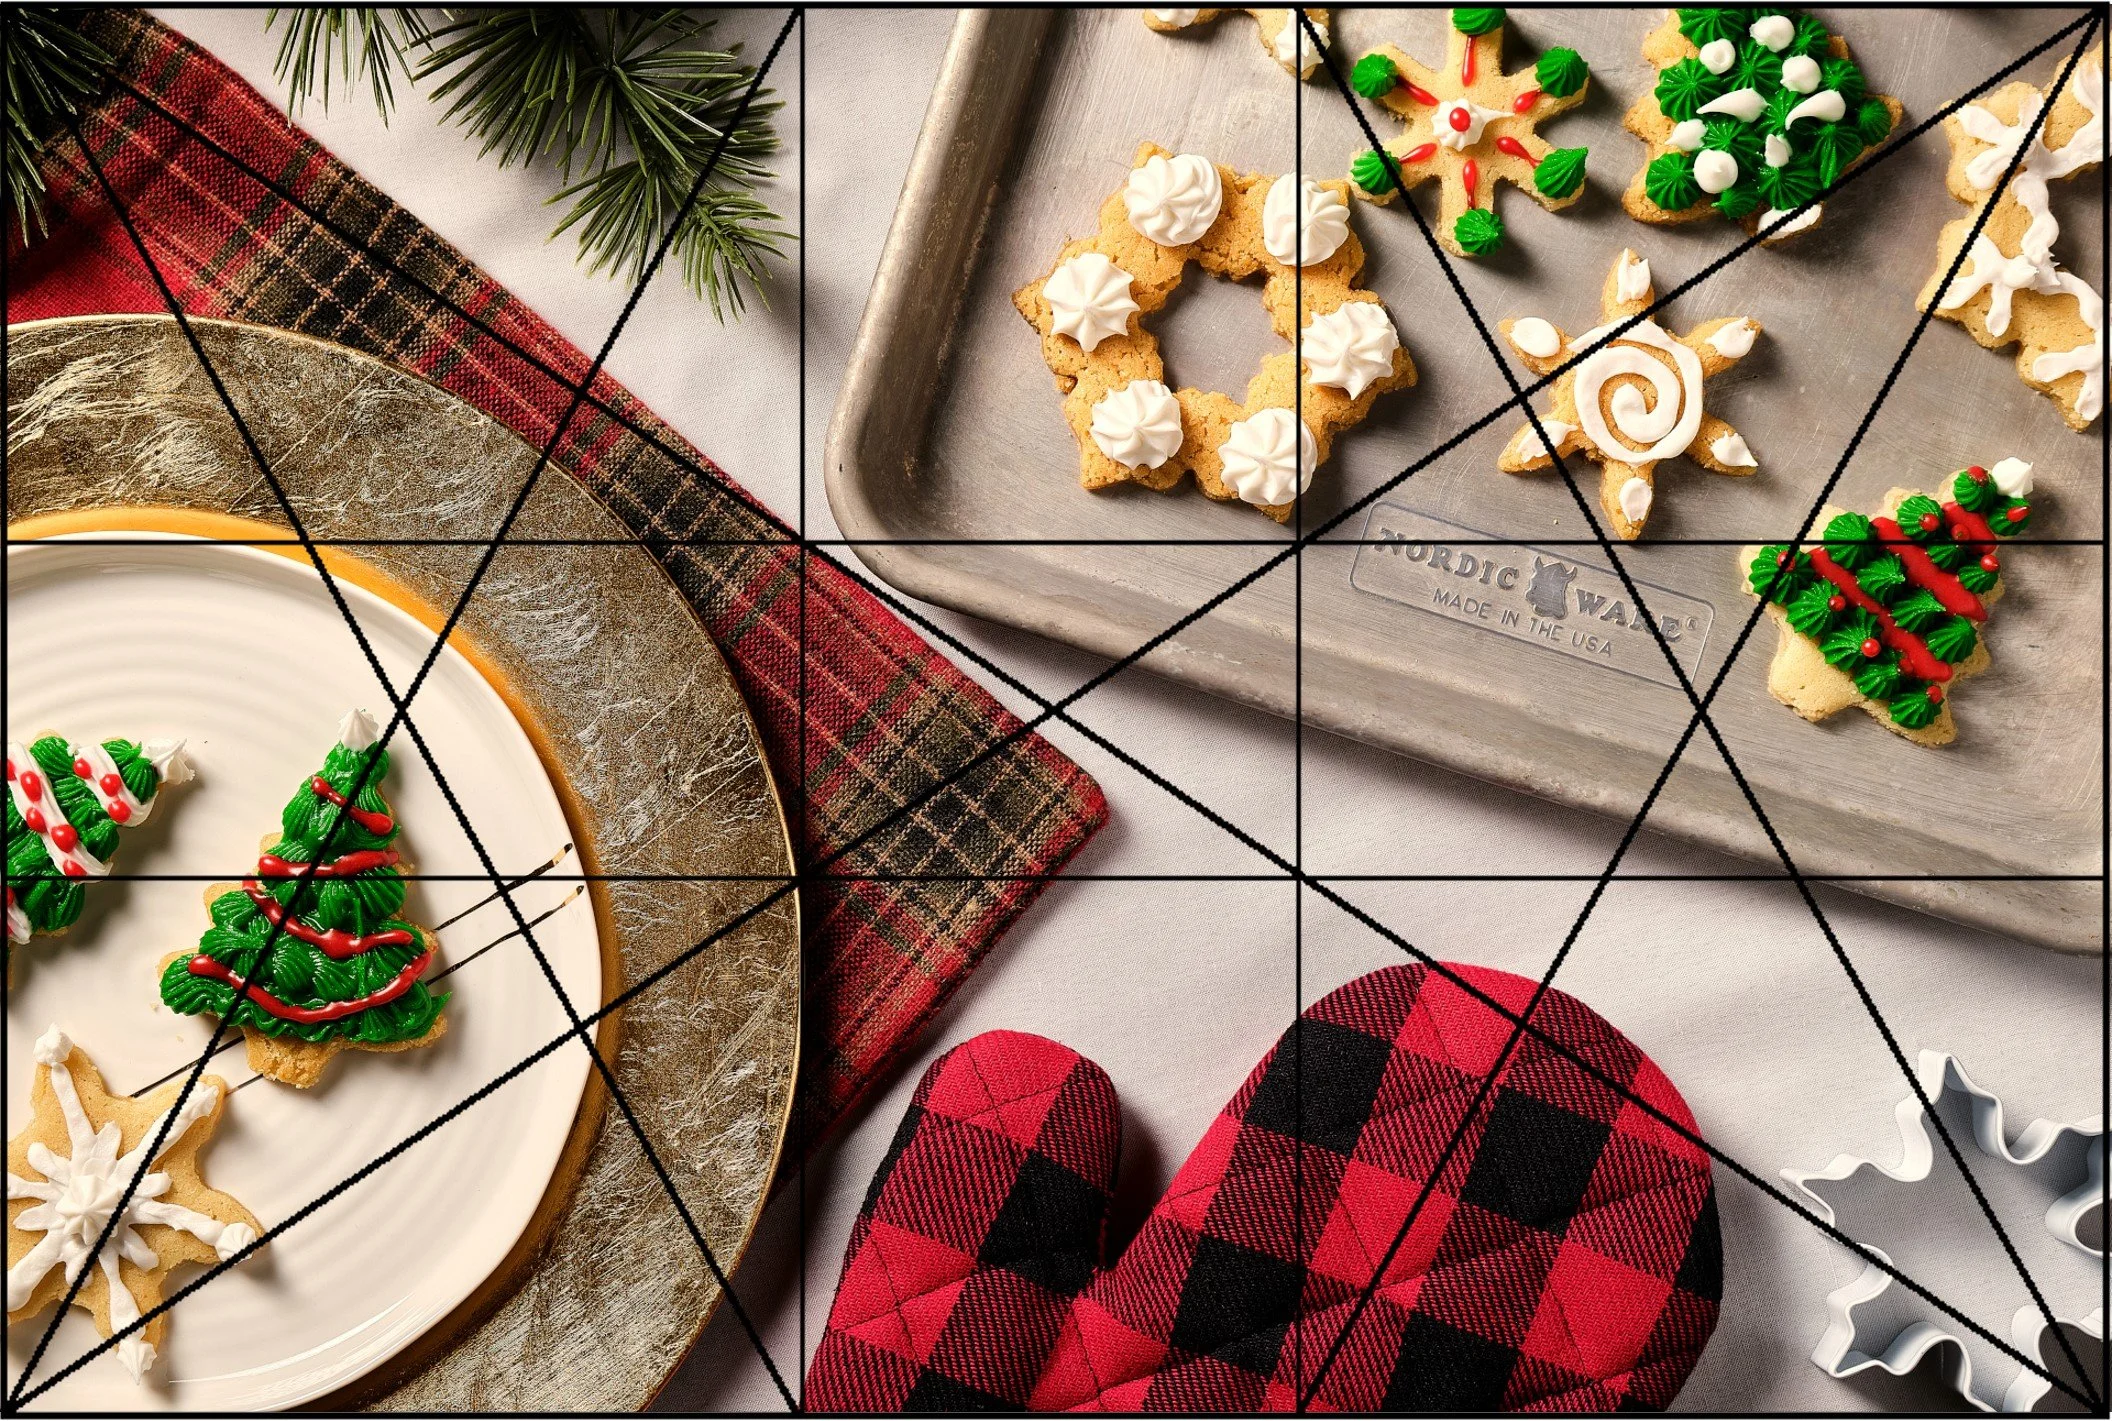
8. Get More Negative with the Phi-Grid
The phi-grid is much like the Rule-of-Thirds when it comes to food photography composition. Both grids look almost the same, but the center lines of the Phi Grid are closer together which encourages the use of negative space in the image.
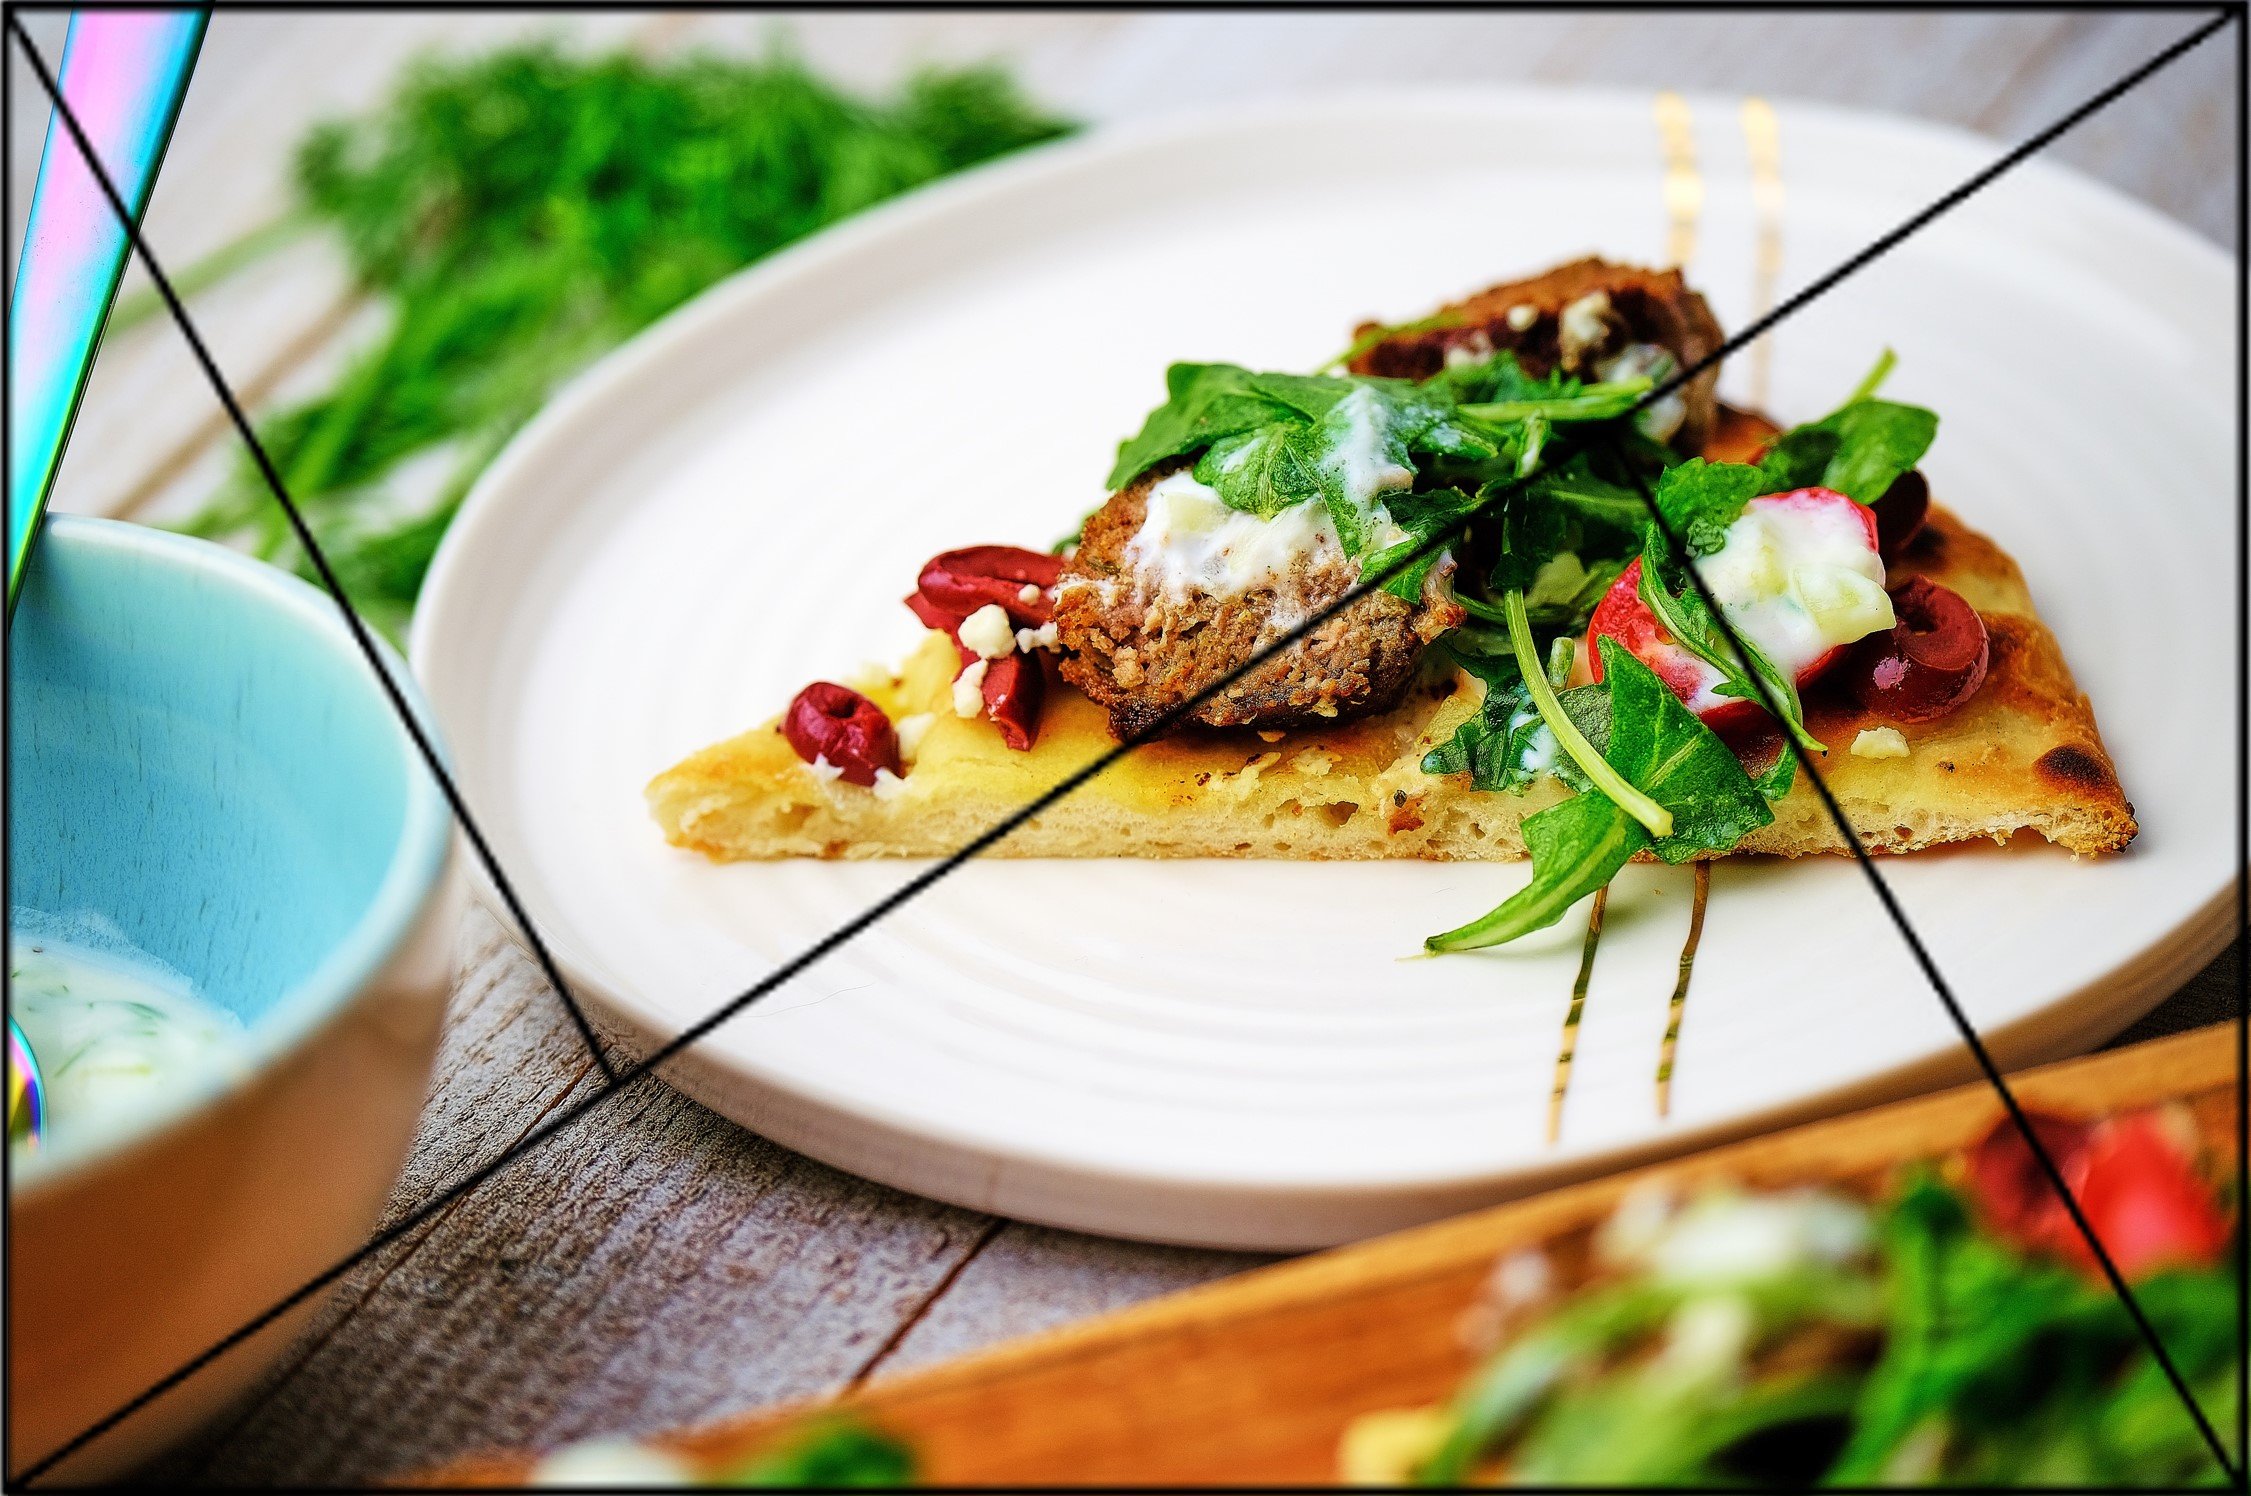
9. Use the Golden Triangle to help them get the Point
Another powerful approach for food photography composition is to use triangles. Triangles keep the attention of the viewer within the frame by taking the eye from one point to another in a continuous loop. This adds a sense of flow and movement for more impact.
To achieve this composition, divide the frame into 4 triangle shapes and, similarly to the previous two grids, place the subjects at points along the lines, and at the intersections of the triangles.
10. Really get Creative with
the Golden Ratio
The phi-grid follows the Golden Ratio, an ancient mathematical concept creates a balanced and pleasing composition. (I won’t bore you with the math.)
The ratio can come in several variations, but the one we care about is the Fibonacci Spiral. You can find this version of the golden ratio anywhere from seashells to the flower petals.
So how can the Fibonacci Spiral help you with your food photography composition? By putting your subjects along a curved line rather than a straight-line creating flow and movement, guiding your viewer’s eye around the image.
This composition technique works very well for overhead shots. It also creates balance when there are several elements in the frame.
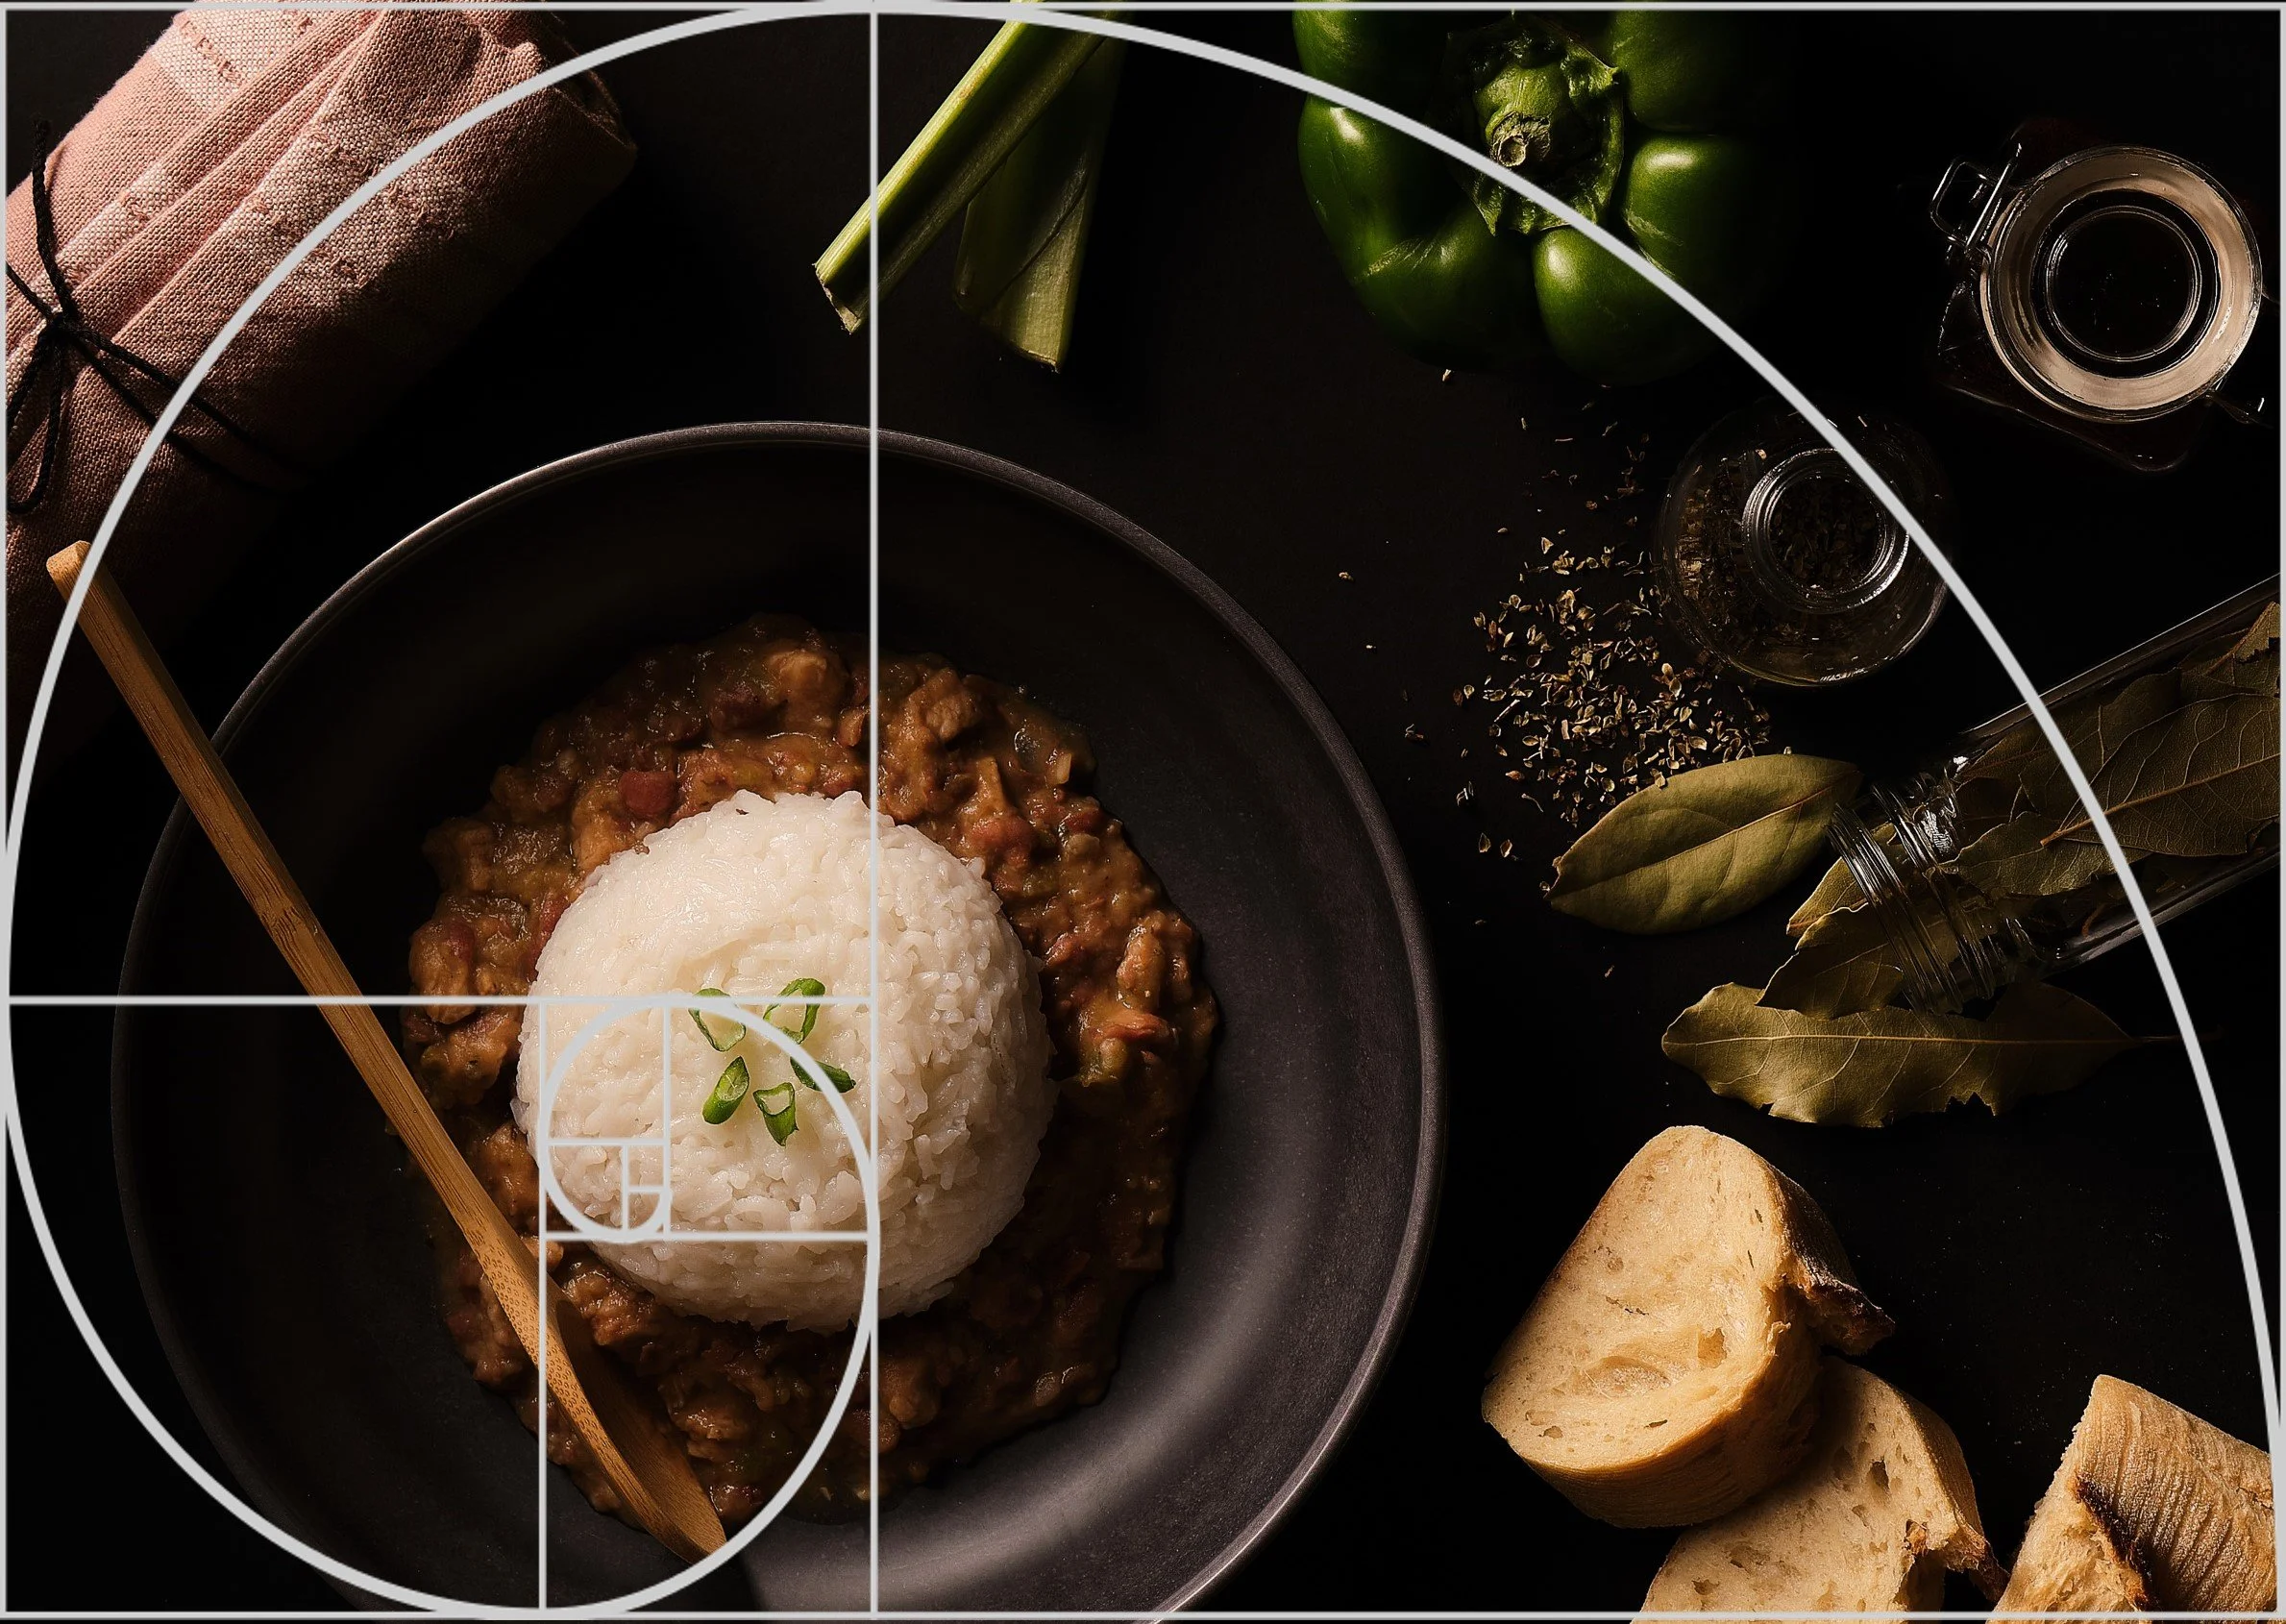
For this picture of the red beans and rice, the placement of the ingredients leads the eye to the bowl, the focal point.
You can flip or turn the spiral when arranging your composition depending on whether you’re shooting vertical or horizontal. The direction of the flow is not crucial.
What’s important is that your focal point falls in the smallest part of the spiral. You should also place other essential elements along the curve.
Use this food photography composition technique to help you create more minimalist images, and keep flat lays and table-scapes from looking too cluttered or disjointed.
Bonus: Blow Your Mind with Dynamic Symmetry
By combining the Phi Grid with the Golden Triangle, we get this craziness called Dynamic Symmetry. Pleasantly enough it’s not quite as crazy as it seems, just place the items on certain lines and intersection points as always, and have fun with it.
Conclusion
Becoming a better photographer involves studying your work. Always think about the various composition tools to help you improve your food photography. Apply the crop guides to some images you have taken and analyze them. Make sure you place your subject where the eye will naturally gravitate. You can use triangles to place your elements in your scene. You can even set your focal points on the intersecting lines of the Phi Grid, Or include some negative space.
Ultimately, the point of the composition is to experiment with different ways to create balanced dynamic images and guide the viewer’s eye. The stronger your composition, the better food photography you create.